

Stainless Steel Hex Bolts Factory Manufacturing Excellence and Quality Control
2026-09-30
When it comes to stainless steel hex bolts, the line between a reliable fastener and a costly failure often starts on the factory floor. At Wanluo, manufacturing excellence isn't just a buzzword—it's a relentless process of material selection, precision forging, and rigorous quality control that most suppliers quietly skip. This article takes you behind the scenes of a production line where every bolt must earn its place, revealing the overlooked details that separate industrial-grade durability from short-lived hardware. If you've ever wondered why some hex bolts survive harsh environments while others corrode within months, the answer might surprise you.
Raw Material Decisions That Shape Bolt Performance
Raw material selection for bolts starts with steel chemistry, but the choices often diverge from what the nominal grade sheet suggests. A 10B21 boron-treated wire can match the hardenability of a 4037 alloy in smaller diameters, yet the boron's effect collapses if titanium isn't present to protect it from nitrogen. That single interaction dictates whether a heat-treated bolt reaches its promised tensile strength or falls short in the core.
Trace elements and inclusions do more to shape long-term performance than most designers expect. Sulfur additions improve machinability but create manganese sulfide stringers that can act as crack initiation sites in cyclic loading. Conversely, calcium treatment modifies inclusions into less harmful globular shapes, which matters when a bolt experiences repeated bending rather than pure tension. Skipping this step to save cost usually shows up later as scattered fatigue failures.
When the service environment pushes into corrosion or elevated temperatures, raw material decisions become a balancing act between mechanical strength and microstructural stability. Duplex stainless grades offer pitting resistance without the extreme cost of nickel superalloys, but their work-hardening behavior makes thread rolling more difficult. Some manufacturers overcompensate with extra alloying elements that the application never uses, adding cost without a performance gain. The best choices come from matching the material's actual failure mode to the part's load history, not from chasing a higher number on a data sheet.
How Hex Heads Get Their Edge in Our Forging Line
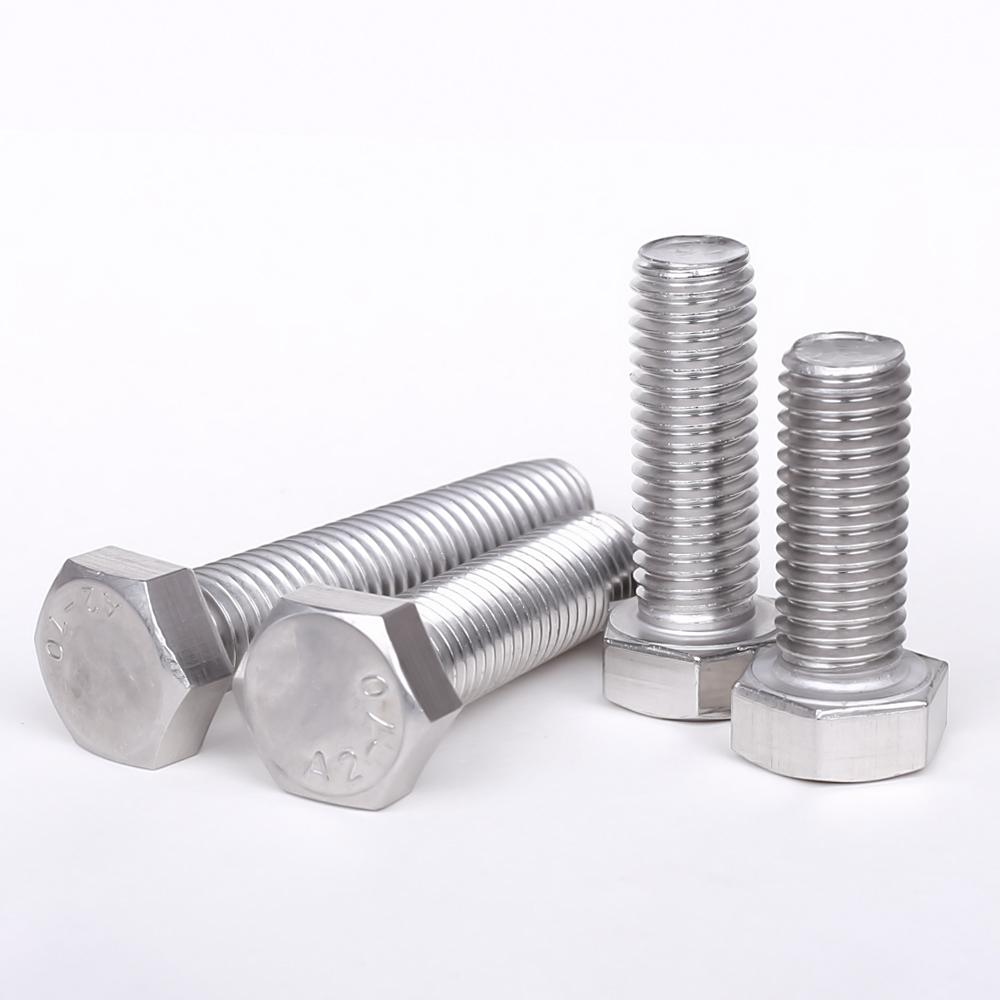
The clean, sharp corners on our hex heads don't come from a cutting tool—they're pressed into existence. We use a closed-die forging process where a heated blank gets squeezed between two precisely machined dies. Under thousands of tons of force, the metal flows outward into the die cavities, filling every angle of the hex. This pushed-flow method aligns the grain structure around the corners, making them denser and more resistant to rounding off than a machined or cast part would be.
After the initial forging blow, the still-hot head passes through a trimming station that shears off the thin flash line left at the parting edges. That's where the edge really gets defined—any excess material is removed, and the six flats come out with a consistent width and a slight chamfer that helps sockets seat smoothly. We check random samples from each batch with go/no-go gauges and laser profile scanners, so the wrench engagement stays reliable without any hand filing or secondary grinding.
Thread Rolling: Where Geometry Meets Grip
Thread rolling displaces metal instead of cutting it, so the final profile inherits the exact shape of the hardened dies. The flanks, pitch, and root radius are formed under high pressure, creating a continuous grain flow that follows the contour of the thread. This gives the geometry a level of consistency and surface integrity that is difficult to match with chip-making methods.
Grip is not a single property; it emerges from how the flank surfaces meet under tension. A rolled thread typically shows a broader, smoother flank area, which spreads the clamping force over more surface. Instead of relying on a few sharp high spots, the load is distributed more evenly, reducing the chance of localized slipping or embedment under cyclic loads.
A less visible advantage is the work hardening that occurs at the crest and root, the small regions that take the brunt of tensile and shear stress. This added hardness, combined with the precise geometry, helps the joint maintain its preload even when vibration, temperature swings, or repeated assembly cycles try to loosen it. The result is a thread that holds not just by friction, but by a better match between its physical form and the forces it carries.
Heat Treatment Cycles Tuned for Stainless Alloys
Stainless alloys do not share a single heat treatment recipe. Austenitic grades, for example, are usually solution annealed between 1040°C and 1120°C, then rapidly cooled to keep chromium carbides in solution and avoid sensitization. Ferritic grades respond better to a lower-temperature anneal around 760°C to 830°C, followed by air cooling or a water quench depending on section size. Martensitic stainless grades take a different path: austenitize at 950°C to 1050°C, quench in air or oil, then temper between 200°C and 370°C for high hardness or at higher temperatures when toughness matters more.
Precipitation hardening grades like 17-4PH need their own tuned cycle. A common practice is to solution treat at about 1038°C, quench, then age at 480°C to 620°C for one to four hours based on the required strength level. Air cooling after aging is usually sufficient, and small shifts in aging temperature can trade hardness for improved corrosion resistance or dimensional stability.
Soak time matters as much as peak temperature. Thin sections may reach uniformity in 30 to 60 minutes, while heavy forgings can need several hours at temperature. A controlled atmosphere or vacuum furnace helps limit scaling and chromium depletion at the surface. Once the soak ends, the delay before quenching should be kept short in austenitic grades so carbides do not re-precipitate along grain boundaries.
Surface Passivation and the Fight Against Corrosion
Corrosion never sleeps, but passivation quietly shifts the odds. By encouraging a metal to form its own protective oxide layer, engineers turn a reactive surface into a stable barrier—often just a few nanometers thick, yet remarkably effective. This isn't about painting over the problem; it's about letting the material defend itself from the inside out.
The trick lies in controlling the environment just enough to favor oxide formation over destructive reactions. Stainless steel, for instance, owes its resilience to chromium, which bonds with oxygen to create a dense, self-healing film. Scratch that film, and it reforms almost instantly in the presence of air or water. That's why passivation treatments—typically using mild acids or controlled oxidation—are less about adding something and more about unlocking what the alloy already knows how to do.
Still, passivation isn't a one-size-fits-all shield. In chloride-rich settings, like coastal salt spray or industrial brines, even the best passive films can break down locally, leading to pitting or crevice corrosion. The fight, then, is ongoing: choose the right alloy, match the passivation method to the real-world conditions, and monitor for the subtle signs of film breakdown long before visible rust appears.
Final Checks: Dimension, Hardness, and Batch Identity
A part can look right on the surface and still fail the moment it meets a mating component. That’s why dimension checks start with a calibrated caliper and, where tolerance is tight, move to a micrometer or CMM. The point isn’t just to confirm numbers; it’s to catch drift before a batch leaves the floor. If a bore starts creeping toward the upper limit in the first ten pieces, that’s a signal to check tool wear, not to adjust the drawing.
Hardness rarely announces itself until a component snaps or deforms under load. We test it in the same environmental conditions where the part will actually work, not just at room temperature when the spec allows. Rockwell, Brinell, or Vickers—each has its place, but the real skill is knowing which surface to test and how many samples give you confidence. A single outlier on the low end can mean the entire heat-treat cycle needs review.
Batch identity is not just a label on a box. It ties the physical part back to the melt lot, the heat number, the operator, and the inspection record. Without that thread, a field failure becomes a guessing game. We mark parts with laser etching or durable tags where the surface allows, and we make sure the same code appears on the traveler, the packing slip, and the final report. It is the difference between a traceable product and an expensive paperweight.
FAQ
We rely on a combination of cold forming with precision dies and in-process laser gauging. Every batch has first-article inspection, and tooling is replaced based on wear curves rather than waiting for rejections. That way a 5,000-piece run stays as consistent as the first ten bolts.
Incoming coils are quarantined until spectrometry and tensile tests confirm the grade. If anything looks off, we reject the entire coil before it ever reaches the header. Mixing heats is a bigger risk than most people realize, so bin control and traceability are non-negotiable.
Yes, custom punch tooling and thread rolling dies let us change head markings, shoulder lengths, or even add a dog point. Lead times depend on the complexity, but standard modifications usually ship within three weeks without sacrificing dimensional checks.
Salt spray testing is one part, but we also run electrochemical reactivation tests on passivated bolts to confirm the chromium oxide layer is intact. For marine-grade orders, we can provide test reports showing no red rust after 1,000 hours in neutral salt fog.
Passivation strips free iron from the surface and allows the natural chromium oxide film to form evenly. Without it, even A2 or A4 bolts can show tea staining quickly. We track bath temperature, pH, and immersion time for every lot because a rushed passivation is almost worse than none.
We run stainless orders on dedicated headers and thread rollers, and the wash line uses separate tanks. Even small carbon steel dust particles can embed into stainless threads and cause galvanic spotting, so housekeeping and tool segregation are part of the quality plan, not an afterthought.
Every box includes a certificate of conformance, and on request we provide full material certs, heat lot numbers, dimensional inspection reports, and salt spray results. It's not just paperwork—it's proof the bolts left the factory in the condition you specified.
We ask for the lot number and a few photos or returned samples first. Our quality team runs a root cause analysis within 48 hours, and if the defect is traced to our process, we rework or replace the batch and update the control plan to prevent recurrence. The goal is to close the loop fast, not just issue a credit.
Conclusion
At our facility, the journey of every stainless steel hex bolt begins long before the first die closes. We select austenitic and martensitic grades based on the exact corrosion and tensile demands of the application, rejecting heats that show even minor inclusion clusters. Once approved, the wire is cut and moved to the forging line, where multi-station cold headers strike the hex head in a sequence that preserves grain flow instead of shearing it. This gives the head its distinctive edge and resistance to rounding under torque. Thread rolling follows with hardened dies that displace rather than cut material, producing threads with higher fatigue strength and a surface finish that holds clamping force more reliably.
But dimensional accuracy is only half the story. Every batch passes through controlled atmosphere furnaces tuned specifically for stainless alloys, avoiding the carbide precipitation that weakens ordinary fasteners. After quenching and tempering, we run passivation in citric or nitric baths to strip free iron and build a chromium oxide layer that actively resists pitting. Final inspection is not a sampling afterthought; each lot is checked for head height, thread pitch, hardness, and proof load, and each box carries a heat number that traces back to the original coil. That traceability, combined with in-house testing, is what keeps our hex bolts performing in marine, chemical, and structural environments where a failed fastener is never an option.
Contact Us
Contact Person: Shane
Email: [email protected]
Tel/WhatsApp: 8613357785029
Website: https://www.wanluohardware.com